Welcome to a behind-the-scenes look at bonsai. No attempt has been made to make this tour comprehensive or particularly instructive. Rather, it is just a peek at the art and craft of bonsai with the hope that it will peak your interest and encourage you to learn more.
The "rescue" tree
|
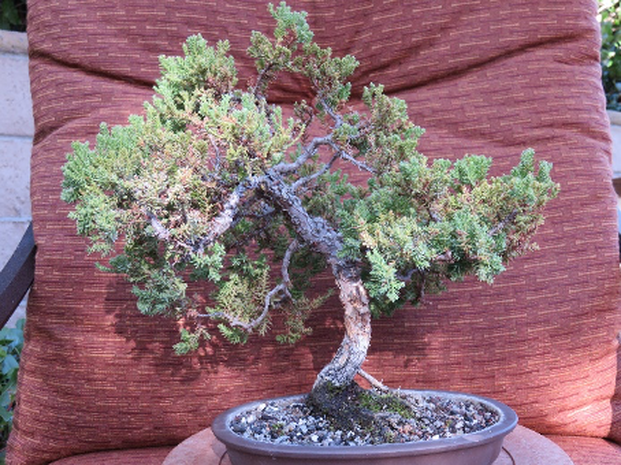
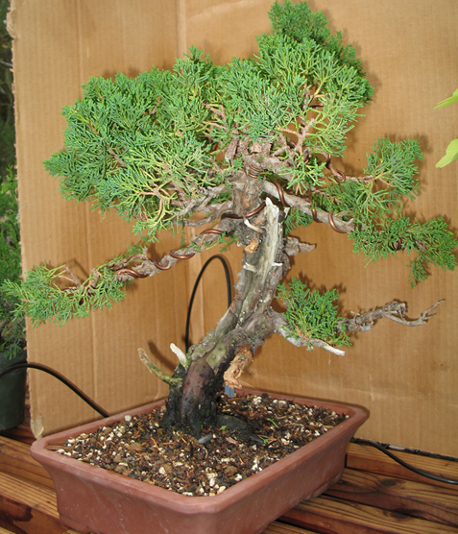
Tree Name: Junipercus chinensis var. procumbens nana (procumbens nana juniper)
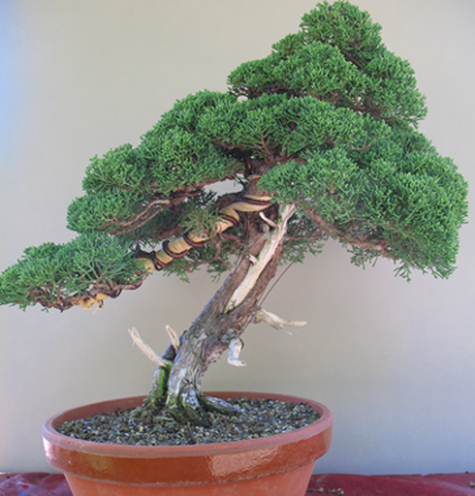
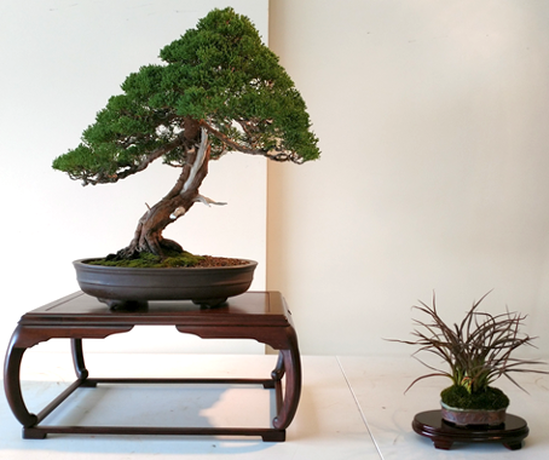
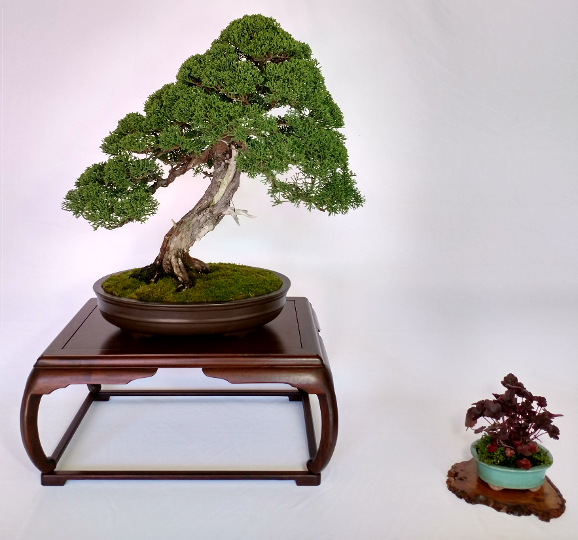
If you admired the bonsai in the Conifer exhibit, you have already seen this tree. This 12-year old procumbens nana was given to me in 2015. As you can see it had a few health issues. One of my passions is to “rescue” bonsai. If you return to the Conifer exhibit, you will see what 5 years of training and TLC by an experienced hand can do. |
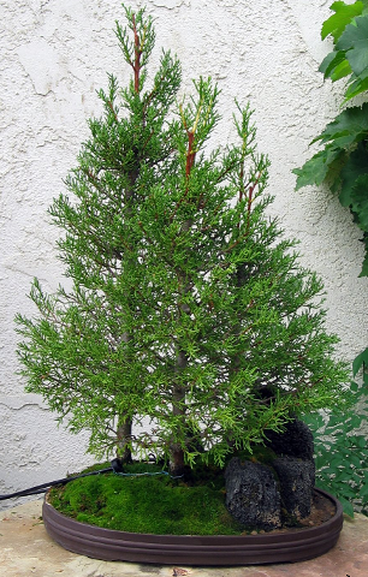
Forest: 2008I obtained this grouping from the Bill Murphy collection in 2008.Notice how it has a rather informal style with a peek-a-boo view of the lava rock which still tends to dominate because of its size and position at the front edge of the pot.
The original artist has created a natural scene that you might come upon unexpectedly in the middle of a forest. It is punctuated by the large rock that would be much taller than you when you walked up next to it. I was drawn to the line created by the tops of the trees and thought it could be trained into a more formal arrangement with less emphasis on the rock. |
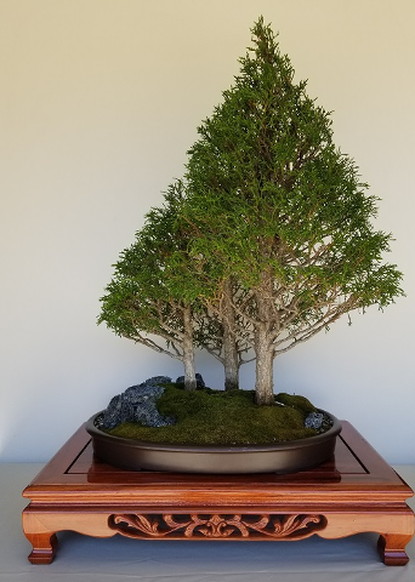
Forest: 2020The lava rock was cut to the height of the soil a few years after 2008 to reduce its dominance and become more of an accent for the trees themselves. The front became the back to move the largest tree to its more prominent postion. This pot is approximately 12x18 and I repotted the grouping into it in 2018.
Notice how the original planting has been transformed into a scene that you might come upon at a rise in the forest. Your eye is first greeted by the formal triangular shape of the branches. But as you look more closely your gaze moves down and you see that it is really three trees. The use of three sized trunks, large in front to small in back, tricks your eye into thinking you are peering back into the depths of a forest. This illustrates how the vision of the bonsai artist has a large impact on the final form of the presentation. |
How do you get them to grow small?
|
This is the obvious question, and the obvious answer is that you trim the branches. However, that is not the complete answer. The real secret to constraining the size of a bonsai is under the ground. The size of the tree is controlled by thinning and trimming the roots. A bonsai tree will be repotted many, many times over its lifetime. Each repotting will include a careful retraining of the root system.
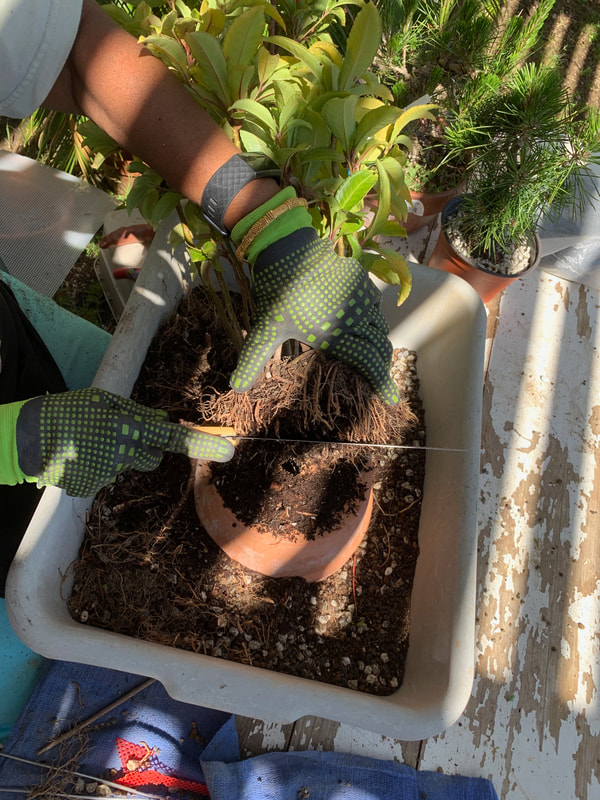
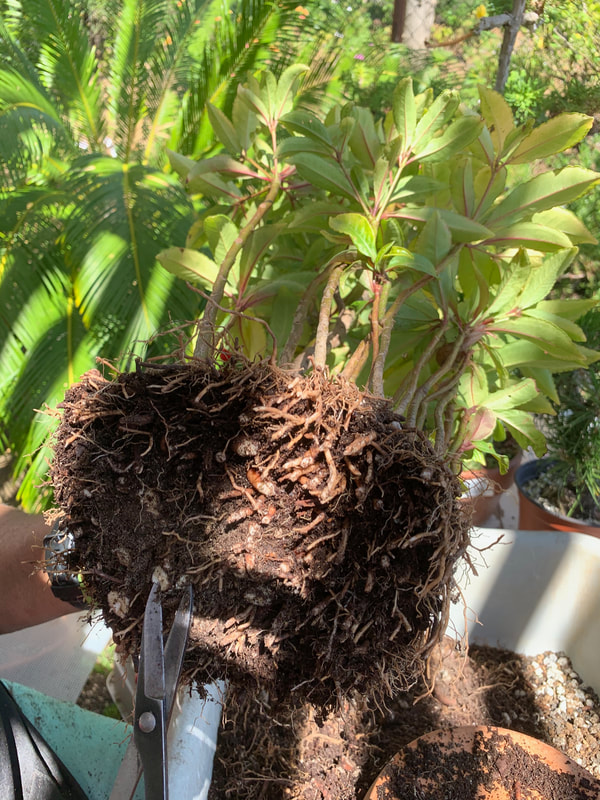
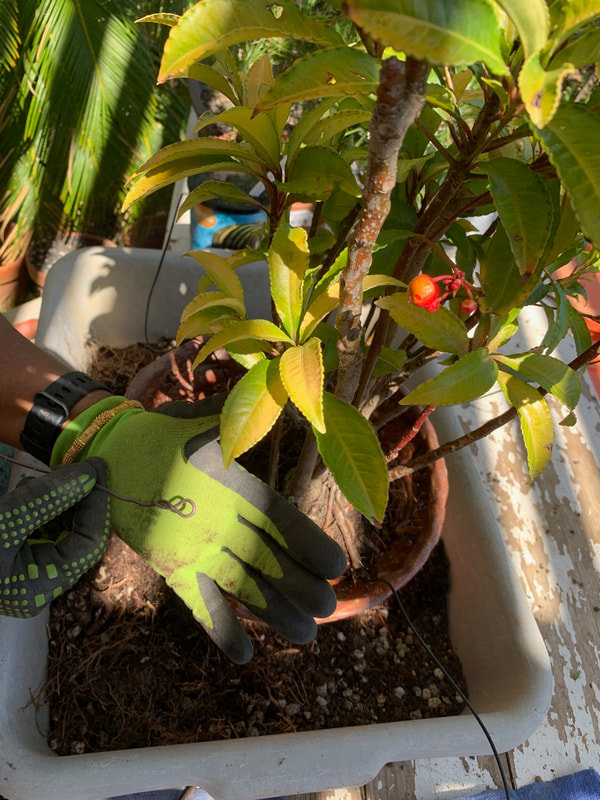
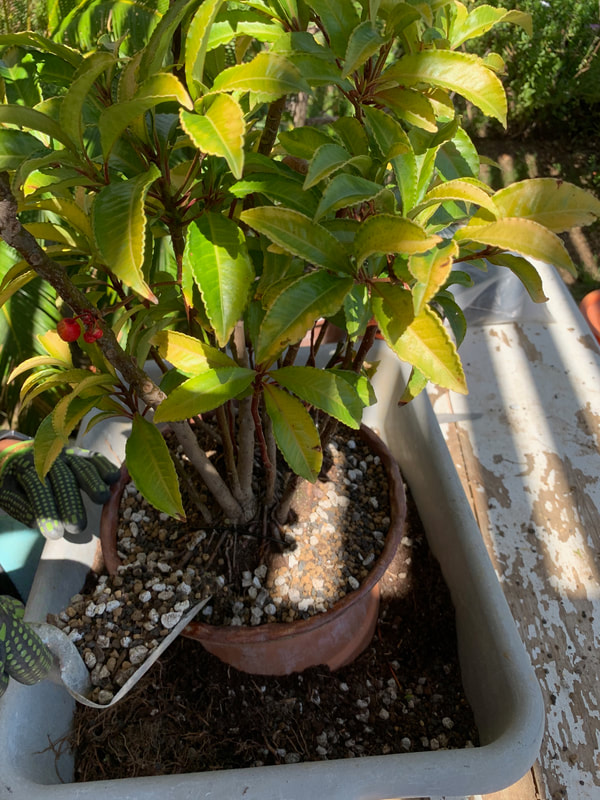
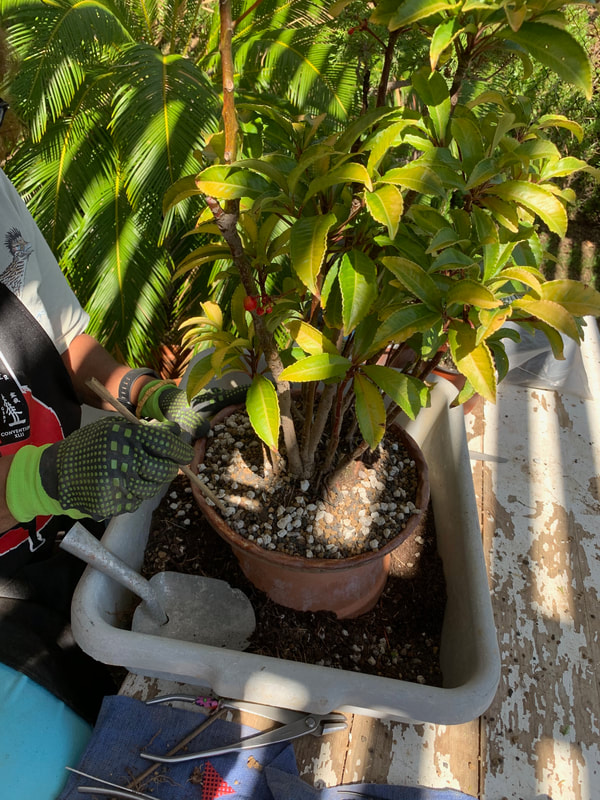
Here is a Coral Berry (Ardisia Crenata). It is normally a shrub which has delightful red berries. It has been allowed to grow in a 1 gallon pot for 4 years. In that time the center and outlying stalks have thickened and now it is time to begin the process of training it into a bonsai. First the nursery pot is cut away and a saw is used to cut through the dirt and roots leaving about half of the original root ball. No need to be too careful at this point, this is hard work. |
|
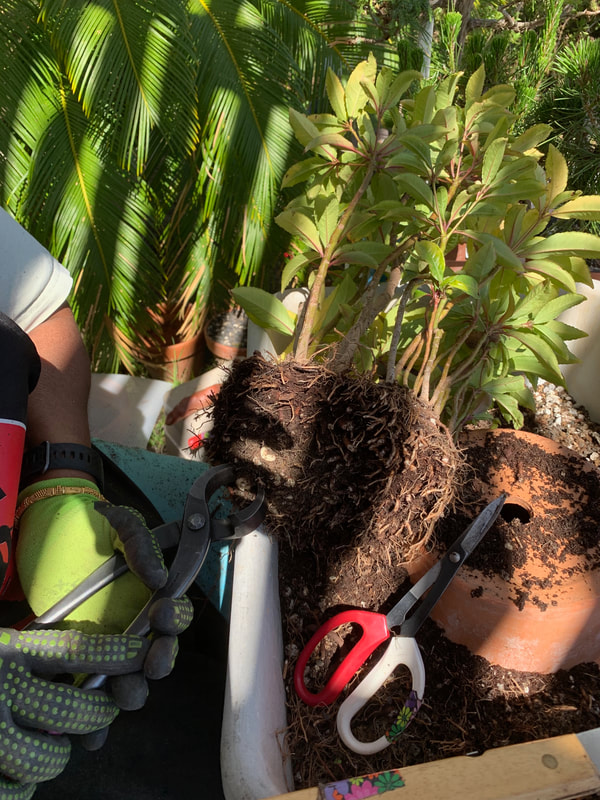
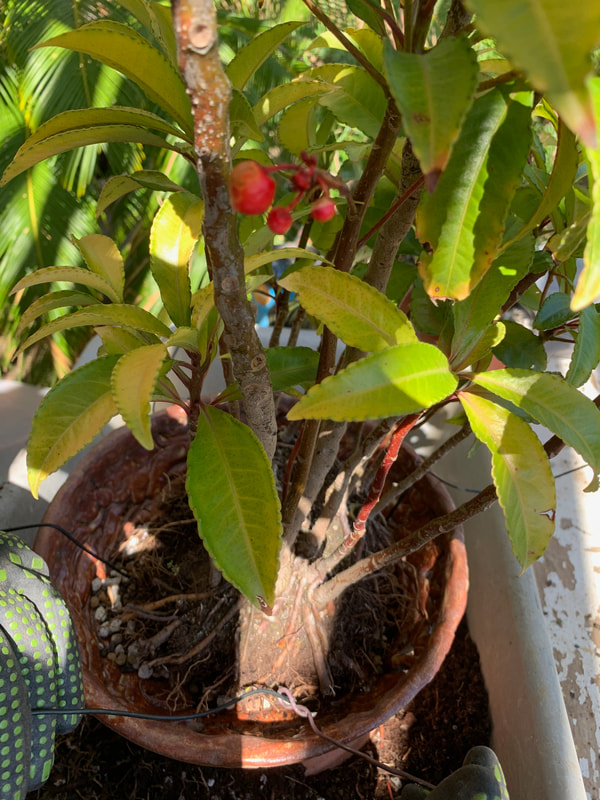
Next the soil is more gently picked away exposing more and more of the root system. These roots are cut back with sturdy scissors. The aim is to reduce the depth of the the root ball to the depth of the pot into which it will be placed. The depth of the pot in turn is roughly determined by the size of the final trunk of the tree. My vision for this plant is a forest grove so none of the trees will have a trunk that is very large in diameter. Therefore, it is being repotted into a relatively shallow pot. Over the course of its training, this plant will be repotted many times. Each repotting will likely further reduce the depth of the root system as the roots spread into a shallow layer. Above ground, the individual stalks will be trained away from each other to create what will appear to be several individual trees. |
|
The larger roots are called the tap roots. They are the part of the root system that anchor the tree in the ground. As such they don't directly provide nutrients to the tree, so they can be cut without affecting the growth of the tree. This is done with special tools, called root cutters, which provide a clean cut that won't harm the tree. Fortunately this root is not too thick and a medium size root cutter will suffice. For larger trees I have to get out the big iron and really put some muscle into it. The nutrients enter the tree through the very fine root hairs. The goal in this repotting is to remove much of the root system but leave intact the proper amount of the fine hair root system. That will produce a healthy tree of the desired size that is properly nourished. |
How do they stand in such a shallow pot?
|
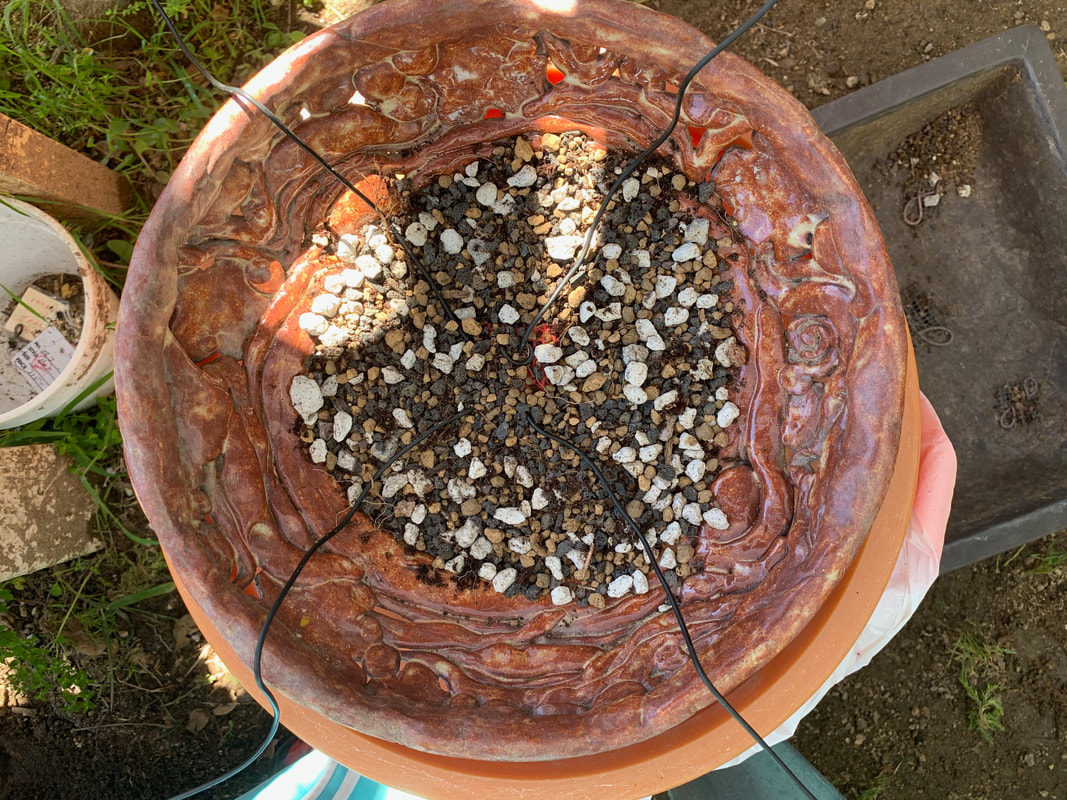
OK. We just saw the tap roots being removed. Isn't that going to be a problem? Yes of course, it would be if it weren't planned for. All bonsai pots have holes in the bottom to provide good drainage, but the holes are also used to run wire up and into the bottom of the pot.
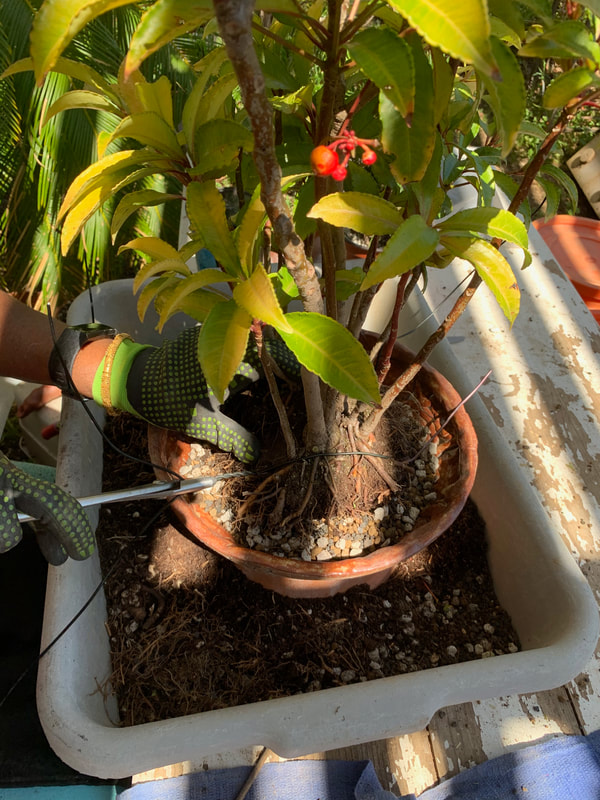
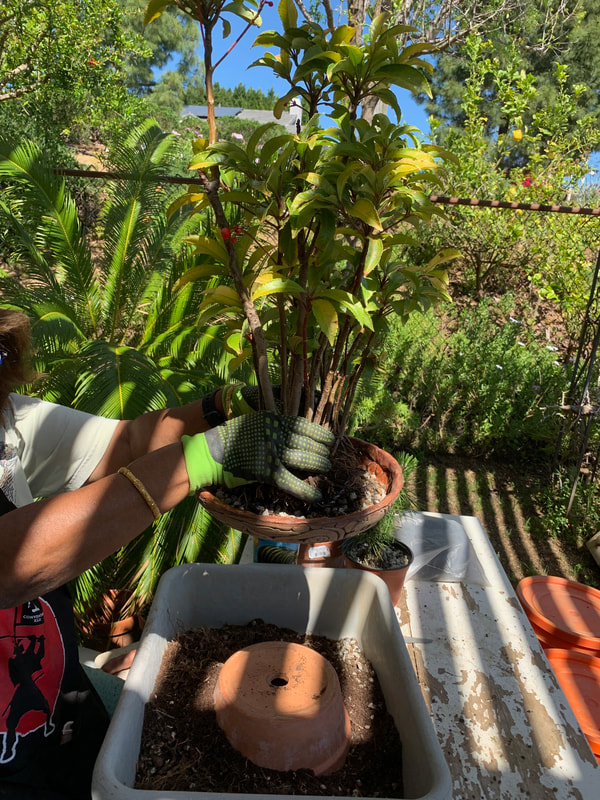
You may have seen a bonsai being trained with wire wrapped around the branches, but there is also wire being used underneath the soil. This pot has been prepared for the new bonsai with wire coming out the the holes in the bottom and a layer of coarse soil such as pumice along the bottom to provide good drainage. |
|
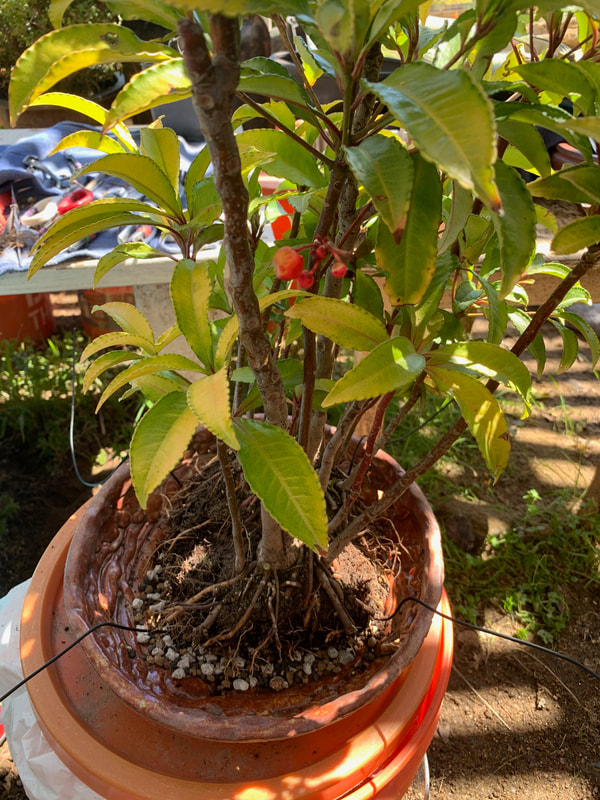
A mound of finer soil is made on top of the drainage layer. The new bonsai plant with its freshly trimmed root system is set into the pot and pressed firmly down into the mound of soil. Notice that his particular plant is going to be trained into a forest planting which will eventually look like a grouping of several individual trees. The leaves currently are full size, but over time, season by season, with careful tending and trimming the new leaves will become smaller as the plant adjusts to its new reduced root system. Again, much of the secret to bonsai is below ground. |
|
Time to fasten the tree into the pot. A bonsai plant undergoes a lot of handling as it is being worked on. This handling can cause the roots to become loose if the tree is not well secured to the pot. A new wire is made with a loop at one end. The loop is placed over one of the wires coming up from the bottom of the pot. The other end of the looped wire will serve as the final attachment point. |
|
Now the wire running through the loop is bent over the top of the roots to the next wire coming up from the bottom. The wires are twisted together to securely hold the roots to the bottom of the pot. The process is continued around the tree to the third and fourth wire. The initial wire with the loop is brought back over to the fourth wire and twisted to complete the fastening. This results in a tree securely attached into the pot. |
|
How did I do? Time for a quality control test. Pick the tree up by the branches and shake! If the pot doesn't fall off and break, the test is a success. The tree is now secured in the pot and there is little chance that it will become dislodged. IMPORTANT NOTE: The repotting process is the ONLY time a bonsai plant is picked up by the trunk or branches. At ALL other times it is moved by handling the pot. Every effort is made to keep the root-to-soil interface intact and undisturbed. |
|
Almost done. A carefully prepared mixture of soils is used to fill the remainder of the pot. This mixture will vary depending upon the species of the tree and the local micro climate in which it is being grown. For many bonsai enthusiasts, the precise recipe for this mixture is their personal secret sauce and you will find a lot of good natured disagreement on the absolute best recipe for a given tree variety and location. |
|
Have you ever been at a Chinese restaurant and seen someone finish eating at the next table over who carefully cleans their single use chop sticks and takes them home? You may have just witnessed a bonsai enthusiast. As soil is added to the repotted tree, a chop stick is used to work the soil down and into the roots. This is a very important part of the repotting process. If any air is left trapped up next to a root, that root will be unable to take nutrients from the soil. Working the soil in with a chop stick reduces the risk of leaving any air gaps within the roots. |
And with that final step the repotting is complete. The root system has been reduced and the plant is stabilized in the pot. The original soil has been augmented with an optimized mixture that will allow the tree to remain well fed. This bush can now begin its training and shaping above ground. Over the next several years, it will gradually be transformed into a beautiful forest group planting, a living art form that projects the artist's vision of the natural world.
Parenting of a bonsai
One of the great pleasures for bonsai enthusiasts is the buying, selling, and trading of trees. It is always fun to look at another tree and imagine how it could be transformed over the years. In the end, it can be like watching and nurturing your own child.
|
2012 Lanky Adolescent
This tree was purchased at the April San Diego Bonsai Club show in 2012 from the current president of the Golden State Bonsai Federation, Mario Rendina. Shortly after purchase of the tree, the Club had a workshop with Ted Matson who redefine the front of the tree. He wired the left and right branches down and out. These branches will become a distinct feature of the retrained tree. To the untrained eye, this is a rather sad looking tree. But to the bonsai artist, there is great potential and all that is needed is time, patience and the proper nurturing. |
|
2015 Maturing Young Adult
Three years later the tree has filled out considerably. What a transformation! What are some of the things that have been accomplished?
Our sad looking tree is growing up. |
|
2017 Debutante to the Ball
Two years later the tree is shown for the first time at the San Diego Bonsai Club Show.
Our sad little tree is all grown up. There are tears and cheers all around. |
|
2020 Dignified Adult
Three more years and the changes are now more subtle.
But unlike your child, a tree is never finished. There is maintenance and always the quest for perfection. Currently, the tree is a bit overgrown so some major branch removal is necessary. However, there will be lots of thinking and consulting with other bonsai people before that first cut is made. |
How do you bend a large branch?
|
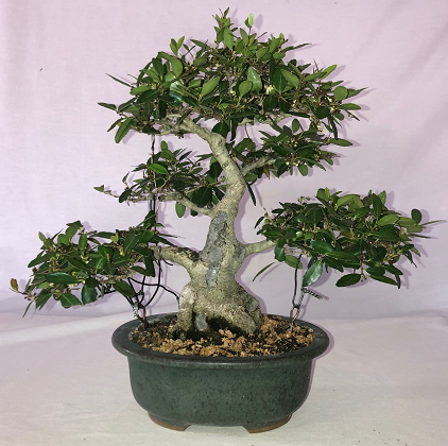
Tree name: Yaupon Holly (Ilex vomitoria)
Height: 11” Age: About 15 years Note: I acquired this tree from a fellow member about one year ago. The leaves have not hardened off so I have not yet pruned it this year. It is in a pot made by Jim Barrett. Upon acquiring the tree, I immediately began to change the alignment of various branches to lower them and create pad layers. I prefer the use of guy wires (v. wiring and bending) as it lessens the chance of snapping a branch. I inserted heavier gauge wire through the two holes in the bottom of the pot and then created loops to which the guy wires are attached. I can safely lower branches over time. The trunk has areas that are damaged and healing. The previous owner applied a cut paste and painted it to better match the color of the trunk. It will be many years before it heals over. The trunk does have ample root flare with many large roots |
Back from the dead
|
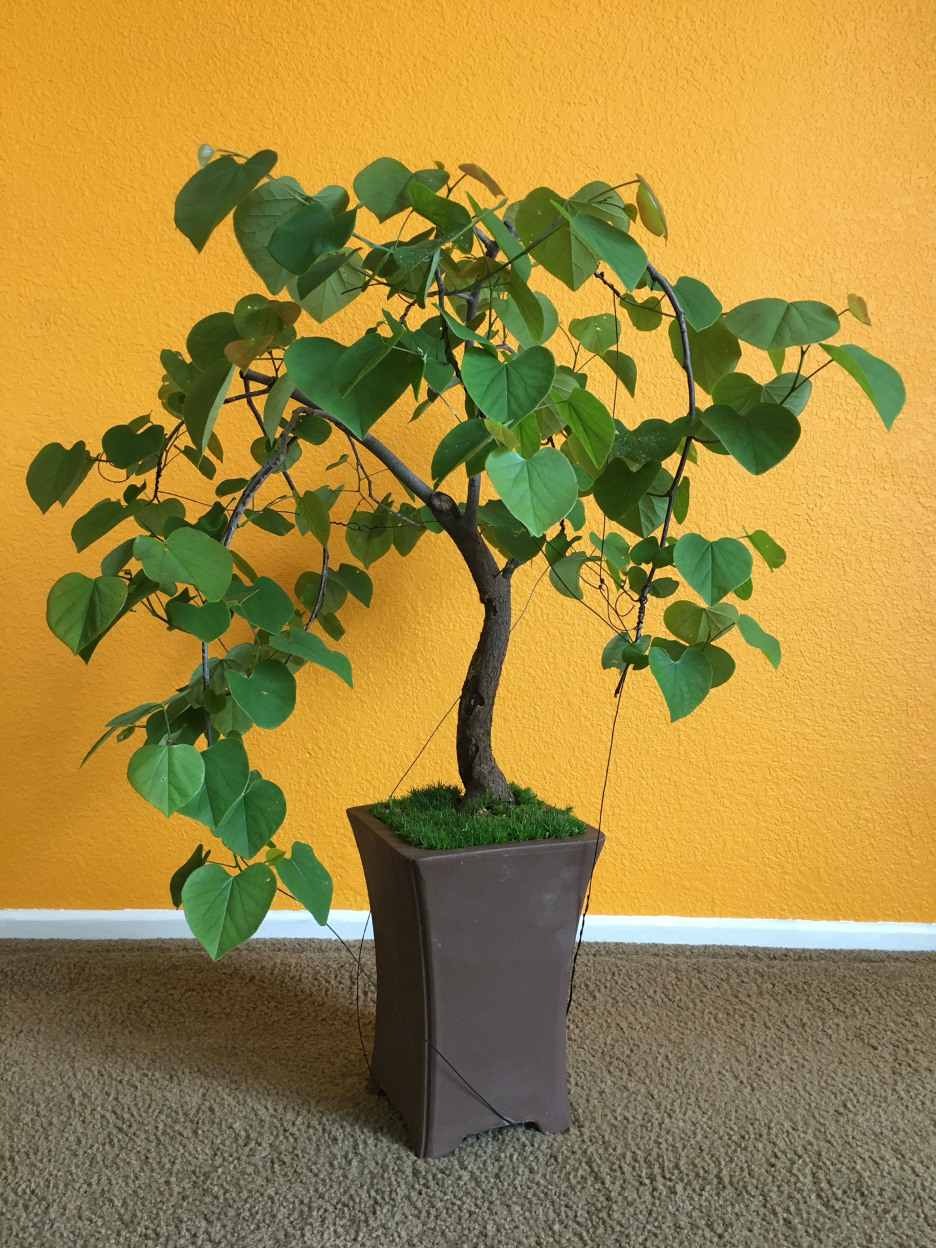
This is a red bud. The poor little tree had appeared to be completely dead after the heat of last summer. Still, I kept watering it and this spring it showed life! So I took a chance and wired and repotted it . It now looks so healthy and really shows off that graceful curving trunk. Notice how the tall curved pot also accentuates that trunk.
|
|
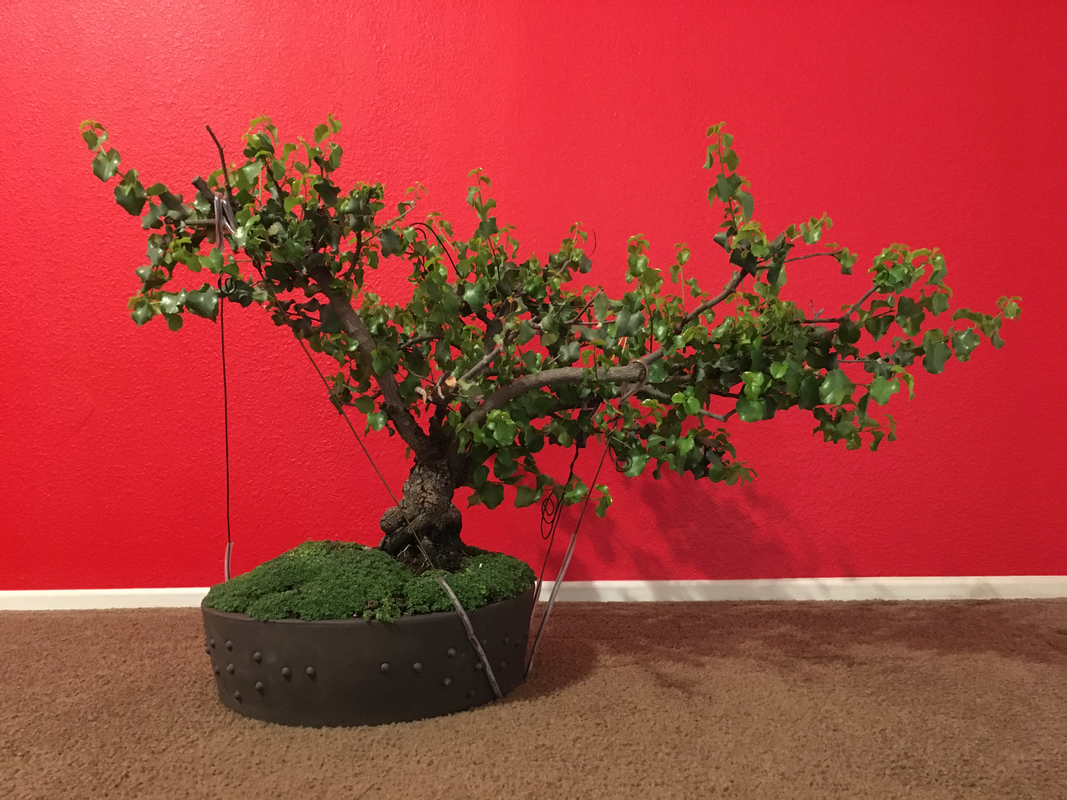
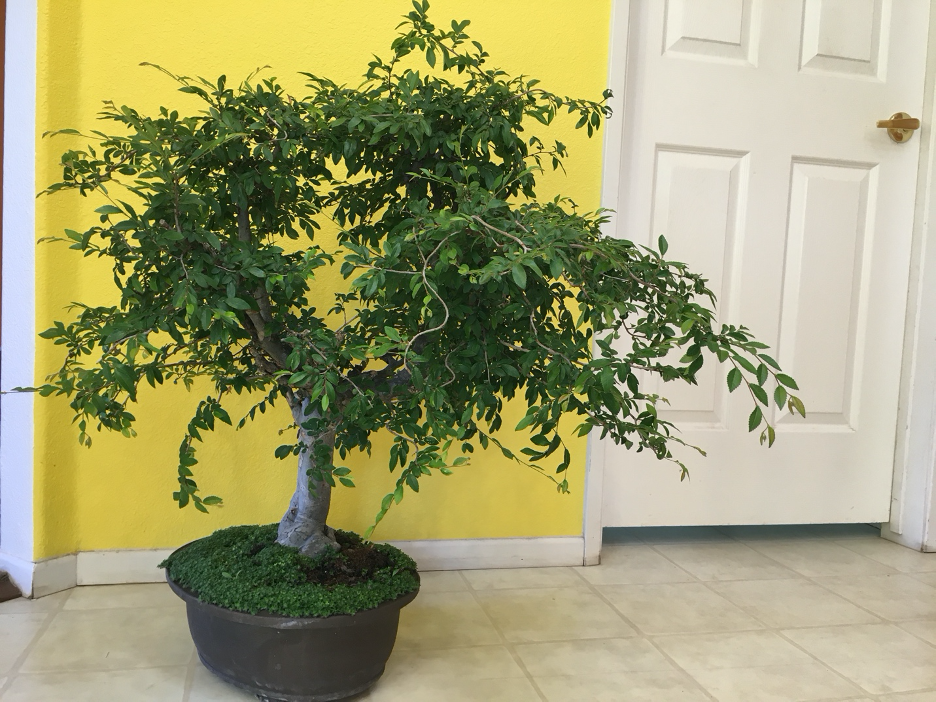
This is a big elm I obtained from a nursery that was going out of business. Once in my yard, it immediately got defoliated by deer but came back with new leaves two weeks later. Then the deer also returned and defoliated it again. It didn’t come back until the following spring.
I have just spent several days wiring it but now realize it really should be pruned first. Ah, grasshopper. The art of bonsai teaches patience and to learn from one's mistakes. |
Decisions, decisions, decisions...
|
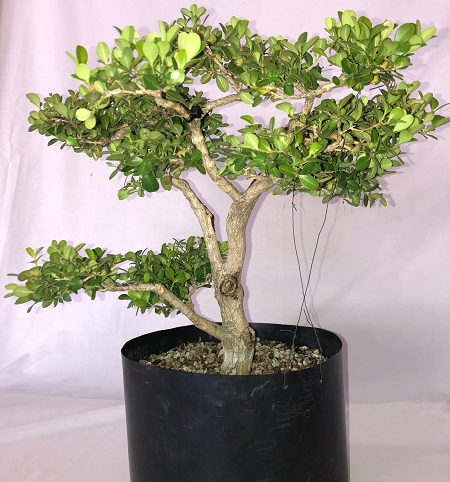
Tree name: Japanese boxwood (Buxus microphylla)
Note: This tree in definitely in a training stage. The leaves have not yet hardened off so I have waited to trim the tree until they do. I acquired it at Home Depot about six years ago. I played with a couple different designs until I decided on what I call the “African Serengeti” look – high branches with flat tops. Think The Lion King. I’ve had it in the plastic pot in Bonsai soil during the six-year period. Boxwoods tend to grow many roots at the base. While not visible, it has a good radial root spread although many of the smaller, finer roots along the top need to be removed. One of the decisions I’m struggling with is whether to remove the lowest branch on the left-side of the tree. The tree trunk has a slight inward curve where the branch begins. An inward curve is exactly where one DOES NOT want a branch. The branch has good ramification, which is easy to achieve with boxwoods, which has added to the difficult decision. I’d like to keep it but if I want to commit to my design, I need to remove it. |
What is Tanuki?
|
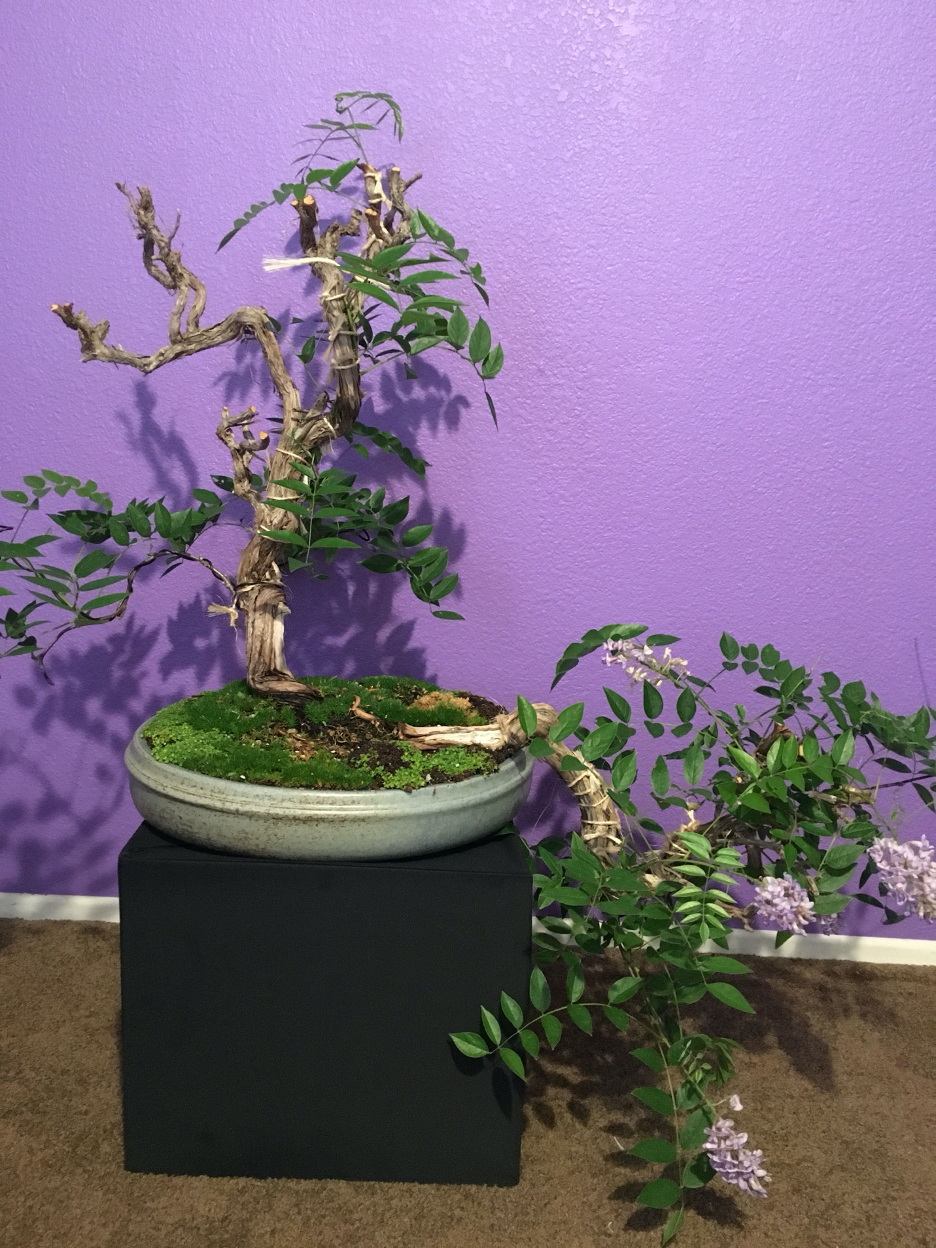
The Japanese Tanuki is a shape-shifting mythical animal known as a trickster. Its name is applied to this interesting bonsai technique. This is my wisteria. But does that trunk look like a wisteria? In fact it is not. This pot contains two dead rosemary trunks. A wisteria is also planted in the pot and then wired and tied to the rosemary. Over time, the wisteria will become attached to the point that the wire and string can be removed. At that point this will be a Tanuki, a bonsai that plays a delightful trick on the eye.
I won this pot in the raffle at a bonsai show in LA. Minutes afterward someone offered me $200 for it. I really considered it for a moment because I had no immediate use for such a pot. In the end I declined and that turned out to be a great decision because it really displays my Tanuki well. |

